"I recorded my meeting with Command+Shift+5, but the other person's voice isn't in there."
It isn't your fault. It's by design. Mac's built-in screen recorder is intentionally limited to microphone audio and can't capture system audio at all.
This piece breaks down the four real differences between Mac's built-in screen recording and a dedicated app, so you can decide whether installing anything is worth it before you do.
What Mac's built-in screen recording can do
Mac actually offers two built-in paths.
Command + Shift + 5 (Screenshot toolbar)

Command + Shift + 5 and a toolbar drops in at the bottom of the screen:- Record entire screen
- Record a selected region
- Toggle microphone on/off
- Set save location
- Set a timer
The interface is intuitive — from "I want to record" to "recording" is about three seconds.
QuickTime Player
Command + Shift + 5 shortcut. Open Applications → QuickTime Player, then File → New Screen Recording. Comes with basic editing — trim, join clips, that's about it.What the built-in tools genuinely do well
To be fair, the built-in options have real strengths:
- Zero install: ready to use the moment you unbox a Mac
- Lightweight and stable: tightly integrated with the OS, low resource cost
- Completely free: no time caps, no watermark
- Simple: minimal learning curve
4 places where the built-in tools fall short
Here's where it gets interesting. The built-in tools have four meaningful limitations, and depending on the use case, any of them can be a deal-breaker.
1. "The other person's voice" doesn't get recorded (the internal audio wall)
This is the one that traps the most people.
It's a structural limit rooted in macOS's security design: apps aren't permitted to access system audio directly through the built-in tools. There's no setting to toggle on.
BlackHole or Soundflower and reroute system audio into the microphone input. But the headaches are real:- Switching your output to BlackHole means your own speakers go silent
- Forgetting to switch it back is a daily frustration ("why is Zoom muted?")
- You often need a mixer app like LadioCast to monitor what you're recording
- macOS updates occasionally reset the Multi-Output Device config
Setting this up the first time can eat an hour easily. Doing it before every meeting is unsustainable.
2. You can't really edit after recording
- Add captions or text overlays
- Highlight key sections with arrows or boxes
- Blur sensitive information (customer names, deal sizes)
- Cut out middle sections
…you have to import the file into iMovie or another video editor. For tutorial videos or anything you're going to share externally, editing is almost always required — so the built-in tool alone won't get you to the finish line.
3. Managing and sharing files is its own job
.mov files by default.Once you record more than occasionally, the problems pile up:
- Your Desktop buries itself in recording files
- You can't tell from filenames which recording came from which meeting
- A one-hour meeting can be 1–2 GB, eating into your SSD
- Sharing with teammates means uploading to Google Drive or Slack every single time
4. Meeting notes are 100% manual
The built-in tool stops at "recording done."
For most work meetings, you'll want to send a summary or share it with people who couldn't attend. That means:
- Re-watching the recording and writing notes
- Pushing the audio through a separate AI transcription tool (often with limited free tiers)
- Pasting the resulting notes into Notion or your team's docs
Who should stick with the built-in tool, who should switch
With those four limits in mind, here's how to figure out which side you're on.
You're fine with the built-in tool if…
These use cases barely benefit from a dedicated app:
- Tutorial videos with no audio (or microphone-only narration)
- Short personal memos to remember a workflow
- Bug reports — short clips, no editing needed
- Recordings you'll only watch yourself, or share manually one-off
If "record it and use it as-is" describes your workflow, the built-in tool's simplicity is genuinely an asset, not a limitation.
You should switch to a dedicated app if…
If any of these apply, a dedicated app saves real time:
- You want to record web meetings and share them with your team
- You need to capture internal (system) audio
- You spend too much time turning recordings into meeting notes
- Your recordings pile up faster than you can organize them
- You frequently add edits or annotations
For anyone working in a remote or hybrid setup, at least one of these is almost guaranteed to apply.
The real cost of building it yourself
It's tempting to think "I'll just install BlackHole, use a free editor, and stay on the built-in path." That works in theory — but the time math usually betrays it. The BlackHole setup is one hour. Switching output paths before each recording is two minutes. Re-routing audio when you change headsets is another five. Sharing requires uploads to a separate cloud. Note-taking is your runtime × 0.5.
If you record once a month, that all rounds to nothing and the built-in path is fine. If you record once a week, you're spending roughly an hour a month on coordination that a dedicated app removes entirely. Whether that's worth $9/month is the actual question.
How to pick a Mac screen recording app (5 criteria)
1. Internal audio support, without a virtual driver
2. Free-tier limits (time caps and watermarks)
Many apps cap free recordings at 5–10 minutes or stamp a watermark on every clip. For meeting recordings, both are dealbreakers.
3. Editing capabilities
Annotations (text, arrows, blur), middle-section cuts, multi-clip joins — make sure the editing features cover what you actually do.
4. Cloud storage and easy sharing
Automatic upload to the cloud and one-click shareable links remove most of the post-recording friction.
5. Post-recording workflows (e.g. AI meeting notes)
The newest generation of screen recorders extends beyond capture into "recording → AI notes → docs." If you want meetings to fold into your knowledge workflow, this is often the deciding factor.
Built-in vs the major apps
| Feature | Mac built-in | Qureco | OBS Studio | Loom |
|---|---|---|---|---|
| Internal audio | ❌ (BlackHole required) | ✅ (no setup) | △ (BlackHole required) | ✅ |
| Watermark | None | None | None | Yes (free tier) |
| Recording length (free) | Unlimited | Unlimited | Unlimited | 5 min cap |
| Editing | △ trim only | Library management | △ | ◯ |
| AI meeting notes | ❌ | ✅ (Pro) | ❌ | △ |
| Notion integration | ❌ | ✅ (Pro) | ❌ | △ |
| Setup ease | ★★★★★ | ★★★★★ | ★★☆☆☆ | ★★★★☆ |
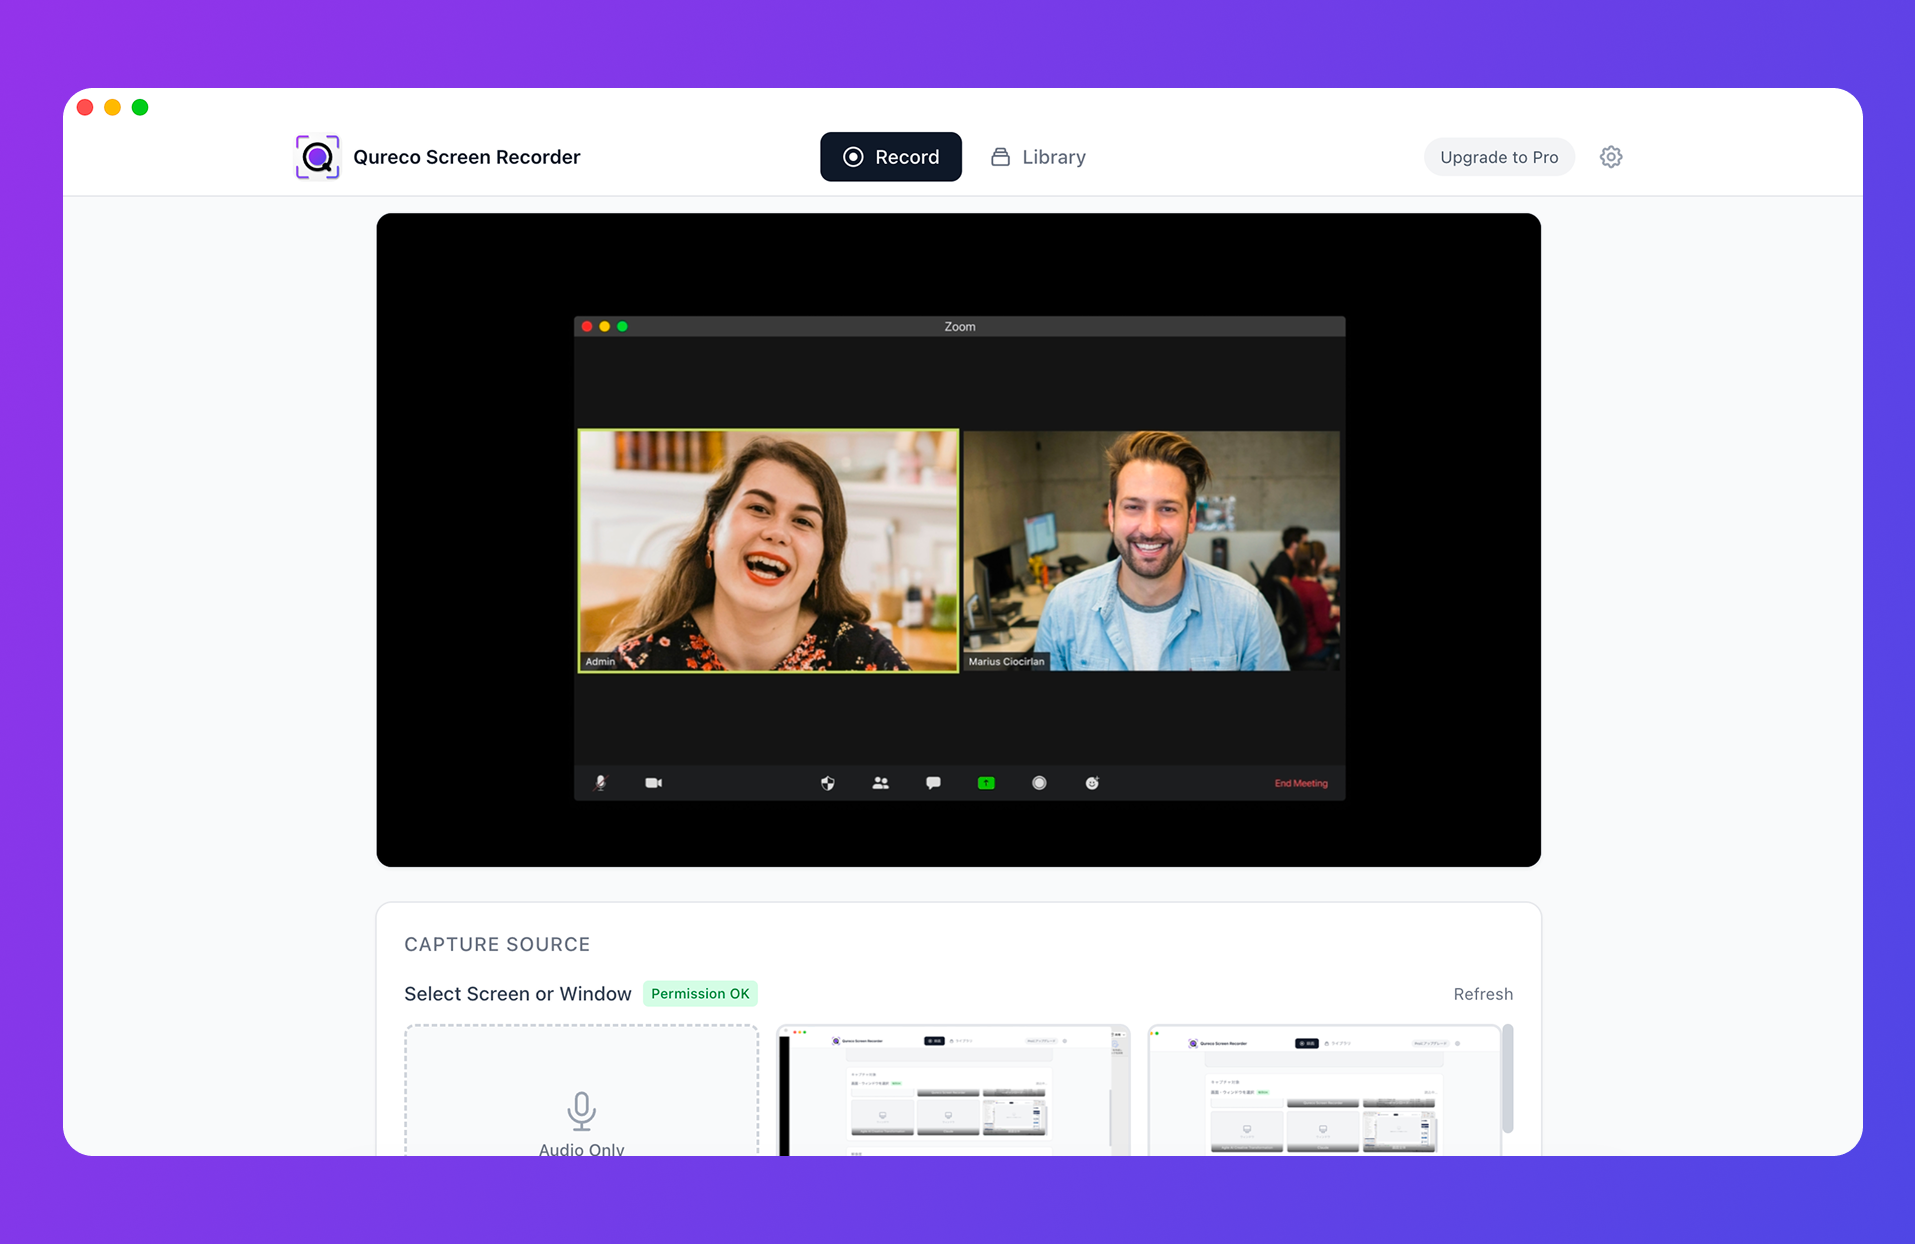
Qureco: from meeting recording to notes, in one app
If everything above sounds like your situation, Qureco is built specifically for it — a Mac-only screen recorder that addresses each of the four built-in limitations directly:
- ✅ Internal audio works without setup — no BlackHole, no Audio MIDI Setup
- ✅ No watermark, unlimited recording on the free tier — usable for actual work
- ✅ Built-in recording library — your Desktop stays clean
- ✅ AI auto-generated meeting notes (Pro) — with speaker identification, Markdown export
- ✅ One-click Notion sync (Pro) — no more manual copy-paste
Handling "recording → notes → Notion" end-to-end is a rare position among Mac screen recorders. It turns recordings from "files you store" into "knowledge your team can actually use."
Use-case quick picks
A short guide based on what you're actually trying to do:
Making tutorial videos
Recording web meetings to share or summarize
Game streaming or live broadcasting
Async video messaging
It's tempting to mix tools, but in practice picking one primary recorder and getting fluent with it saves the most time. Switching mental models every recording is the silent productivity tax most people don't account for.
How long does the decision actually take to pay off?
Worth being honest about the math. If you record once a month, the time you save by upgrading from the built-in tool to a dedicated app is roughly zero — you spend more time setting up the new tool than you save in any given month. If you record once a week, the math tips fast: about an hour a month back, plus the reduction in cognitive overhead from "did I remember to switch the audio output back?" If you record daily (sales, customer success, demo-heavy roles), the dedicated app pays for itself in about two weeks of saved manual note-taking and re-routing.
Pick the tool that matches your use case
The four differences again, in one place:
- Internal audio — built-in can't capture it; some dedicated apps capture it with no setup
- Editing — built-in is trim only; dedicated apps add annotations, cuts, joins
- Management & sharing — built-in is manual; dedicated apps centralize via library and cloud
- Meeting notes — built-in is 100% manual; apps like Qureco automate the entire loop
If the built-in tool has never given you trouble, there's no need to install anything. If any of "meeting recording," "note-taking," or "team sharing" is the part causing friction, a dedicated app can collapse that work dramatically.
Especially if you want to systematize web meeting recording and note-taking, Qureco is built around that loop. Install it once, and the "record → notes → Notion" flow works from day one.
Qureco Screen Recorder
Powerful screen recording app for Mac
Record meetings, let AI handle the notes, just read what arrives in Notion.
Try all features free for the first month.